
To make beeswax wraps, start with natural cotton fabric cut into desired sizes. Melt beeswax using a double boiler or microwave, then use a brush to evenly coat the fabric. Lay the coated fabric on parchment paper or a silicone mat, and warm it slightly in the oven to set the wax. Once cooled, mold the wrap around food or containers with your hands. Keep watching for tips to customize and perfect your homemade beeswax wraps.
Key Takeaways
- Use natural, unbleached cotton fabric to ensure eco-friendliness and safety.
- Melt beeswax gently using a double boiler or microwave, then evenly coat the fabric with a brush.
- Cover the waxed fabric with parchment paper and heat in a warm oven (~180°F) to set the wax uniformly.
- Allow the wraps to cool and harden before molding around food or containers for a seal.
- Reuse and maintain the wraps by washing with cold water and mild soap, avoiding hot water to prolong durability.
Making beeswax wraps is a simple and eco-friendly way to replace plastic cling film in your kitchen. These wraps are an excellent example of sustainable packaging, offering a natural alternative to single-use plastics that harm the environment. By making your own, you not only reduce waste but also gain control over the materials you use, ensuring your kitchen stays as eco-conscious as possible. Beeswax wraps are versatile and reusable, helping you cut down on disposable plastic while keeping your food fresh.
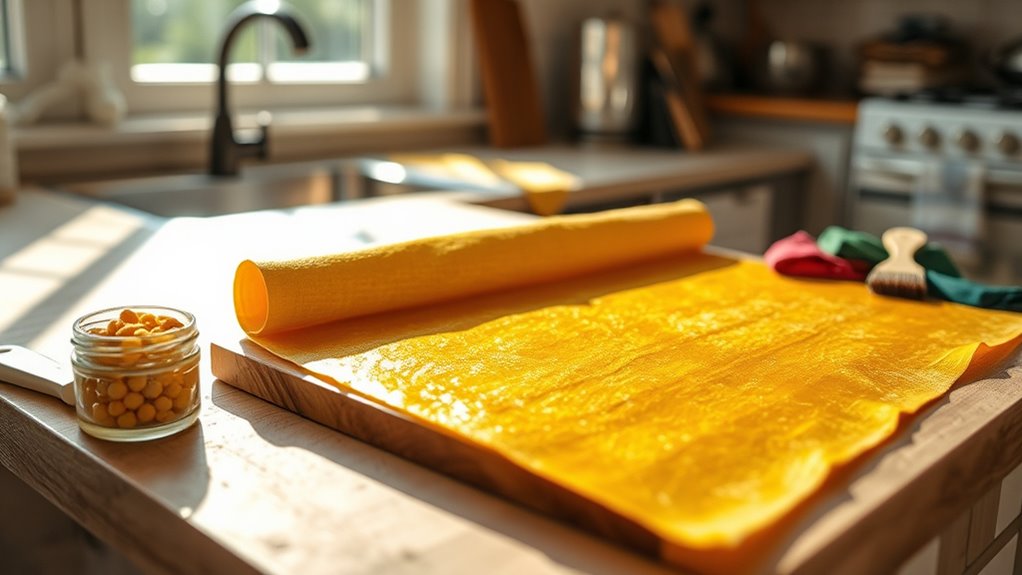
To start, gather your materials: cotton fabric, beeswax pellets or blocks, a clean paintbrush, a double boiler or microwave-safe container, and a piece of parchment paper or silicone baking mat. Opt for organic or unbleached cotton for the best sustainable packaging. Cut your fabric into the desired sizes—small for covering bowls, larger for wrapping sandwiches or cheese. Before applying the beeswax, make sure your fabric is clean and dry, as any dirt or moisture can interfere with the wax’s adherence.
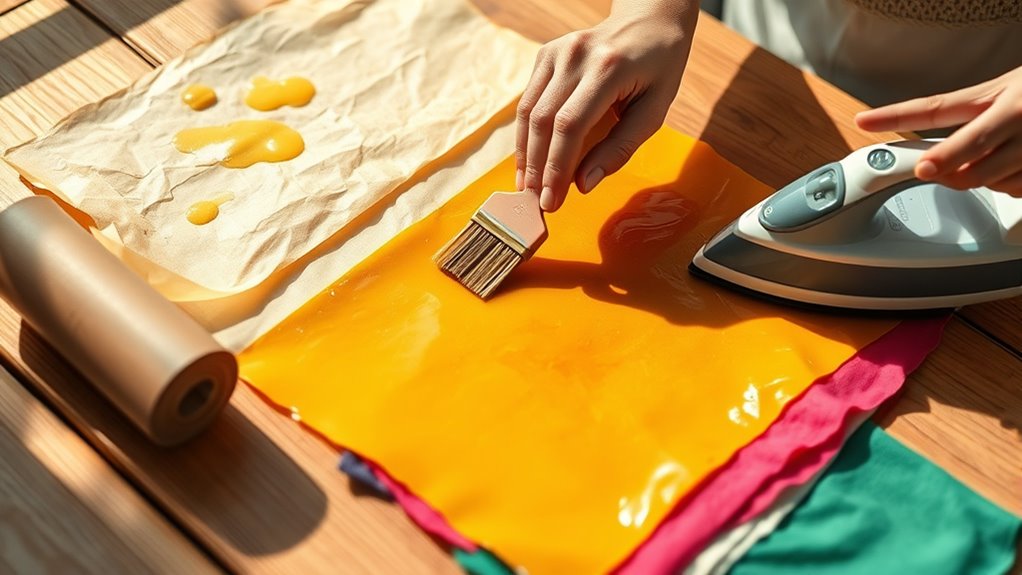
Next, melt the beeswax. If using a double boiler, fill the bottom pot with water and place the beeswax in the top pot, heating gently until melted. For microwave use, put the beeswax in a microwave-safe container and heat in short bursts, stirring in between until fully melted. Once melted, dip your brush into the beeswax and evenly coat the fabric, making sure to cover every inch. You want a good, even layer that will make the fabric pliable and waterproof but avoid over-saturating it, which can make the wrap stiff.
Lay the coated fabric on parchment paper or a silicone baking mat, then place it in a warm oven at around 180°F (82°C) for a few minutes. This step helps the beeswax to set and evenly distribute across the fabric. Once the wax is melted into the fabric, carefully remove the sheet from the oven and use the back of your brush to smooth out any uneven areas or excess wax. Let the wrap cool and harden before using. When you’re ready to use it, simply mold the wrap around your food or container with the warmth of your hands.
Making beeswax wraps encourages sustainability by reducing reliance on plastic packaging. Using environmentally friendly materials can further enhance the eco-benefits of your wraps. They’re durable, washable, and can last for months if cared for properly. Plus, they’re a natural alternative that’s free from harmful chemicals found in some commercial wraps. This simple process empowers you to create eco-friendly solutions that benefit the environment and your health while keeping your food fresh in style.
Top picks for "make beeswax wrap"
Open Amazon search results for this keyword.
As an affiliate, we earn on qualifying purchases.
Frequently Asked Questions
How Long Do Homemade Beeswax Wraps Last?
Your homemade beeswax wraps typically last about a year with proper care. To maximize their lifespan, wash them in cool water with gentle soap and avoid heat. As a sustainable packaging option, they’re a great eco-friendly alternative to plastic, reducing waste and environmental impact. Regularly reapplying beeswax can extend their usefulness. When they become thin or torn, it’s best to replace them, ensuring your eco-conscious efforts continue effectively.
Can Beeswax Wraps Be Washed in a Dishwasher?
You shouldn’t put beeswax wraps in the dishwasher, as it’s not dishwasher safe. The high heat and strong detergents can damage the beeswax coating, reducing their effectiveness and lifespan. Instead, opt for gentle cleaning methods: use cool water and mild soap, then air dry. Keep your wraps clean and functional by avoiding dishwasher safety risks and preserving their natural, reusable qualities. Proper care guarantees they last longer and stay effective.
Are Beeswax Wraps Safe for All Food Types?
You can use beeswax wraps for most foods, but consider food safety and allergen concerns. They’re safe for fruits, bread, and cheese, but avoid using them with raw meats, fish, or greasy foods, as bacteria can grow. If you or someone else has allergies to beeswax or other ingredients, take precautions. Always wash wraps thoroughly and inspect for damages to make sure they stay safe and effective for your food storage needs.
How Do I Store Beeswax Wraps Properly?
To store beeswax wraps properly, follow these storage tips to keep them fresh and effective. Always clean and dry your wraps thoroughly before storing. Fold them loosely and keep them in a cool, dry place away from direct sunlight, which can cause the wax to melt or become sticky. Avoid storing near heat sources or in the fridge for extended periods, as this helps preserve their freshness and pliability.
Can I Reuse Beeswax Wraps After They Wear Out?
Your beeswax wraps can be reused countless times, transforming your sustainable packaging habits and dramatically reducing waste. With proper care, their durability extends far beyond initial use, making them an eco-friendly staple in your kitchen. When they start to lose their stickiness or become thin, simply refresh them by reheating with a bit of extra beeswax. This guarantees your wraps remain effective, stylish, and sustainable for many more meals ahead.
Conclusion
Now that you know how to create your own beeswax wraps, imagine the possibilities—less plastic, more sustainability, and a touch of craftsmanship in your daily routine. But what if I told you there’s a secret way to make your wraps even more effective? Stay tuned, because the next step could transform how you reduce waste forever. Your eco-friendly journey is just beginning, and the best is yet to come. Are you ready to discover what’s next?