
To build a recycled glass bottle chandelier, gather bottles of various shapes and colors, then carefully clean and cut them to create openings. Use a sturdy frame or wire system to mount the bottles securely, spacing them evenly for aesthetic appeal. Choose your lighting—string lights, LED, or candles—and attach them inside or around the bottles. Smooth rough edges with sandpaper for safety. If you keep exploring, you’ll discover how to customize your design and improve its final look.
Key Takeaways
- Collect and thoroughly clean various bottles, then cut openings using a glass cutter or heated string, smoothing edges with sandpaper.
- Choose appropriate lighting (string lights, LEDs, candles) and attach bottles securely to a stable frame or wire system.
- Arrange bottles evenly, considering color, shape, and size for optimal light diffusion and aesthetic appeal.
- Ensure safety during assembly by securing bottles firmly and verifying stability before installation.
- Install the chandelier in a suitable space, matching the design with decor, for a stylish, eco-friendly lighting feature.
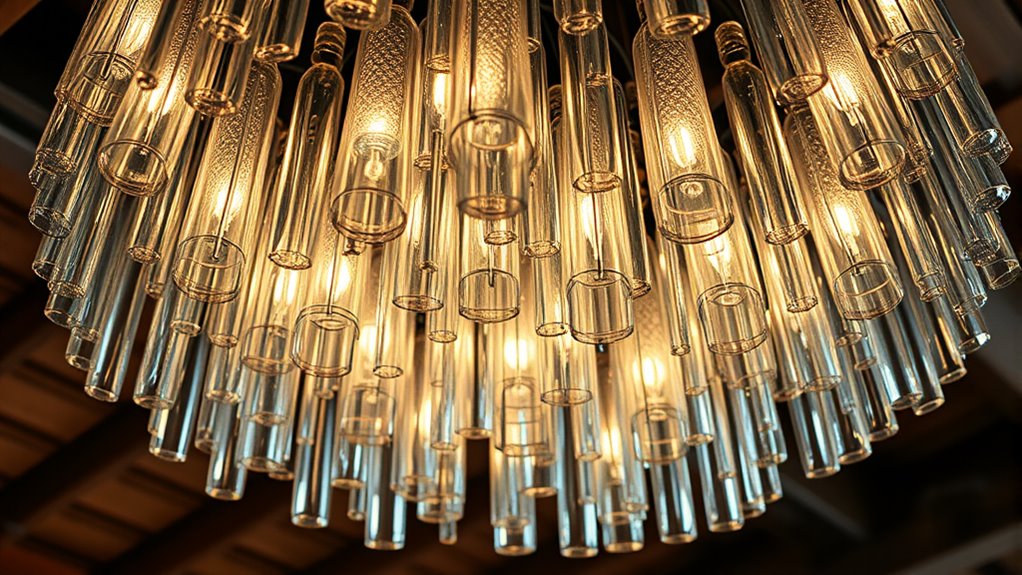
Creating a recycled glass bottle chandelier is an eco-friendly way to add unique charm to your space while repurposing everyday materials. When you decide to craft your own chandelier, you embrace upcycling techniques that transform simple bottles into stunning lighting fixtures. This project not only reduces waste but also allows you to explore innovative lighting design that reflects your personal style. The key is to plan carefully, selecting bottles that complement your space and deciding on the overall look you want to achieve. Whether you prefer a rustic, vintage vibe or a sleek, modern aesthetic, the upcycling process offers endless opportunities to customize your chandelier.
Begin by gathering bottles of different shapes, sizes, and colors to add visual interest. Cleaning and removing labels is essential, as it helps you visualize the final product and guarantees safety during assembly. Next, you’ll need to decide how to cut the bottles; most commonly, you’ll cut around the neck or the middle to create openings for mounting or to form individual light elements. Using a glass cutter or a heated string method, you can make clean cuts. Safety precautions are crucial here—wear gloves and eye protection to avoid injuries from sharp edges. After cutting, smooth the edges with sandpaper to prevent cuts and give your bottles a polished look.
Lighting design plays a pivotal role in your chandelier’s impact. You can opt for string lights, LED bulbs, or even small candles, depending on the ambiance you want to create. Installing the lighting involves attaching the bottles to a sturdy frame or wire system, ensuring they are evenly spaced for a balanced appearance. When hanging the bottles, consider the height and arrangement to maximize light dispersion and aesthetic appeal. Incorporate hooks, wire, or metal rods to secure each bottle, making sure the entire structure is stable and safe.
As you assemble, think about how the upcycling techniques used will influence the lighting effect. Clear bottles may allow more light to pass through, creating a luminous glow, while colored bottles add warmth and mood. Experiment with different configurations until you find the arrangement that best fits your space. Finally, install your chandelier in the desired location, whether over a dining table, in a cozy nook, or as a statement piece in a hallway. Your recycled glass bottle chandelier not only embodies sustainable design but also becomes a striking conversation starter that showcases your creativity and commitment to eco-conscious living.
Frequently Asked Questions
What Safety Precautions Are Recommended During Installation?
During installation, you should prioritize safe handling of glass bottles to prevent cuts, wearing gloves and eye protection. Always turn off the power supply to guarantee electrical safety before connecting wiring. Use proper tools and follow instructions carefully to avoid accidents. Keep your workspace clean and dry, and double-check your connections. If unsure, consult a professional. Staying cautious helps you create a beautiful chandelier safely and effectively.
How Do I Customize the Chandelier’s Size and Shape?
Think of your chandelier as a sculpture you’re shaping from glass clay. To customize its size and shape, explore various customization options like adjusting the number of bottles or altering their arrangement. For shape variations, experiment with different bottle orientations and grouping patterns. You can make it larger or smaller by adding or removing bottles, and change its form from cascading to clustered, creating a unique piece that reflects your style.
Can I Use Different Types of Bottles for the Design?
Yes, you can definitely use different types of bottles for your chandelier to enhance design flexibility. When choosing bottles, consider their shape, color, and size to create a unique look. Mixing various bottles adds visual interest and allows you to customize the chandelier’s style to fit your space. Experiment with different styles to achieve the perfect combination, making your recycled glass bottle chandelier truly one-of-a-kind.
What Lighting Options Work Best With Recycled Glass Bottles?
It’s a happy coincidence that LED bulbs work so well with recycled glass bottles, providing bright, energy-efficient lighting that highlights their beauty. You should also consider installing dimmer switches to create the perfect ambiance, whether you want a cozy glow or vibrant light. LED bulbs and dimmer switches together give you versatile lighting options, making your chandelier both functional and aesthetically pleasing.
How Long Does It Typically Take to Complete the Project?
The project typically takes about 10 to 20 hours, depending on your experience and the chandelier’s complexity. Your timing estimates will vary based on factors like the number of bottles, the type of lighting you choose, and your familiarity with DIY projects. Expect the project duration to include planning, sourcing materials, assembling, and installing. Staying organized and patient helps make certain a smooth process and a beautiful finished chandelier.
Conclusion
As you hang your recycled glass bottle chandelier, remember it’s like turning everyday trash into a sparkling treasure. Just like a garden blooms from tiny seeds, this project transforms simple bottles into a dazzling centerpiece. Imagine the pride you’ll feel, knowing you’ve crafted something beautiful and eco-friendly with your own hands. Every time you switch on the light, think of it as shining a bit of creativity and sustainability into your home—proof that small changes make a big impact.