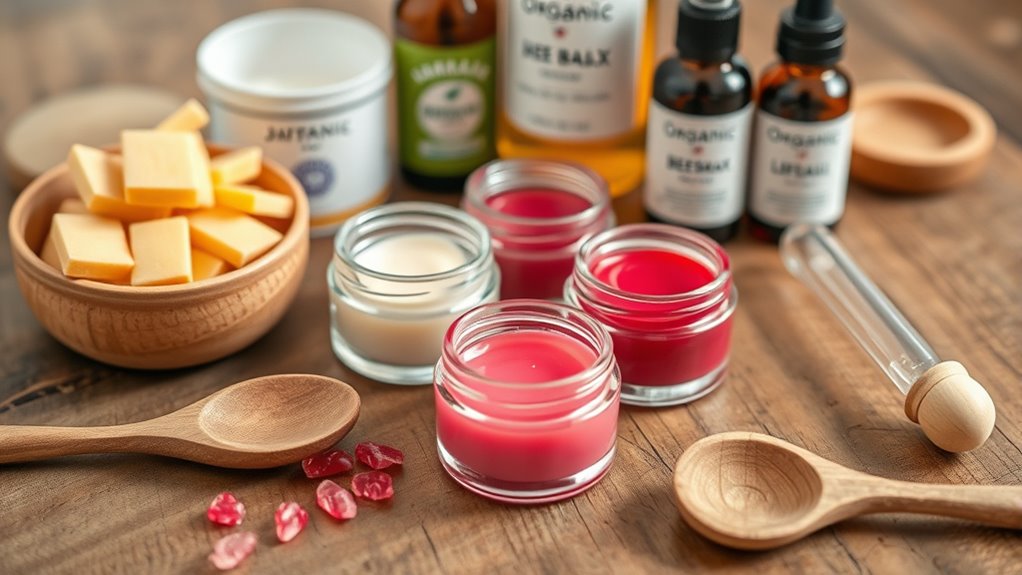
To craft your own natural lip balm and tinted gloss, gather ingredients like beeswax, shea butter, coconut oil, and safe pigments such as beetroot or mica. Use a double boiler to melt your ingredients gently, then customize flavors with natural extracts. Pour your mixture into eco-friendly containers and let them cool and set. For vibrant shades and textures, experiment with different pigments and ratios. Keep your creations fresh by storing in a cool, dark place—learn more to perfect your DIY beauty!
Key Takeaways
- Gather natural ingredients like beeswax, shea butter, coconut oil, and eco-friendly containers for homemade lip products.
- Melt beeswax and oils in a double boiler, then add natural flavorings and pigments for customization.
- Pour the mixture into containers carefully using a dropper or funnel, allowing it to cool and set undisturbed.
- Incorporate natural pigments such as beetroot powder or mica to create tinted lip gloss shades.
- Store finished products in airtight, cool, dark places to maintain freshness and extend shelf life.
Top picks for "natural balm tint"
Open Amazon search results for this keyword.
As an affiliate, we earn on qualifying purchases.
Gathering Your Ingredients and Tools
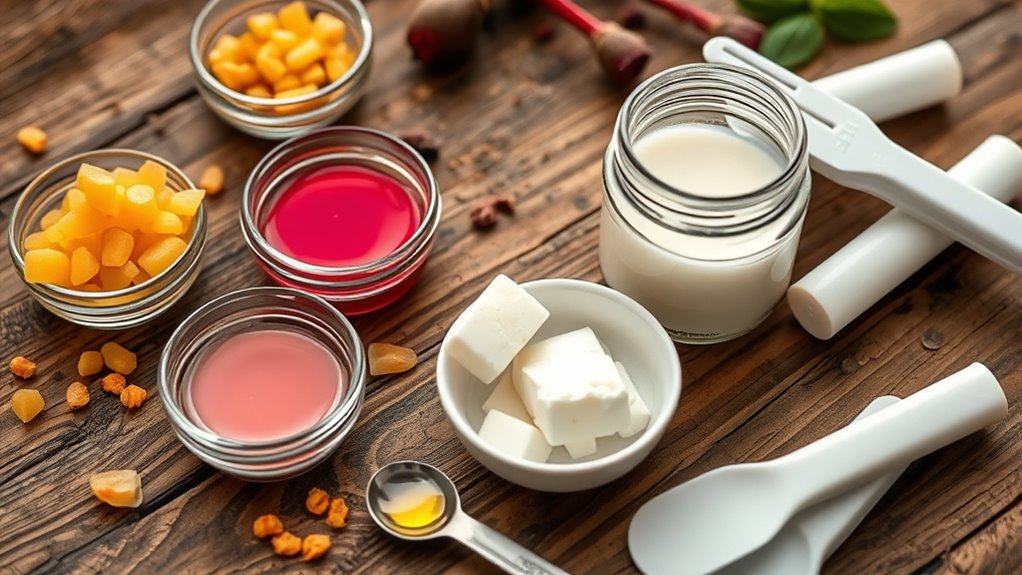
Before you begin making your DIY lip balm and tinted gloss, it’s important to gather all the necessary ingredients and tools. Start with simple, natural ingredients like beeswax, shea butter, coconut oil, and natural preservatives such as vitamin E oil, which help extend shelf life. You’ll also need small containers or lip balm tubes for packaging, so choose eco-friendly options that keep your product fresh. Gather a double boiler or a heat-safe bowl for melting ingredients safely. Don’t forget essential tools like a spatula, dropper, and mixing bowls. Proper lip balm packaging not only preserves your creation but also adds a professional touch. Having everything ready beforehand guarantees a smooth process and a satisfying homemade lip product that’s both natural and beautifully presented. Additionally, choosing the right ingredients can enhance the effectiveness and appeal of your lip balm.
Preparing a Double Boiler for Melting

Choose a heatproof bowl that fits snugly over your saucepan, ensuring it doesn’t touch the water. Use gentle, low heat to melt your ingredients evenly without scorching. This careful approach helps preserve the quality of your lip balm and gloss. Additionally, using a double boiler method helps prevent overheating, which is especially important when working with delicate ingredients.
Selecting the Right Equipment
Using a double boiler is essential for safely melting ingredients without direct heat, which helps prevent burning or scorching. When selecting equipment, make sure you have a sturdy heatproof bowl that fits snugly over a pot. This setup allows gentle, even heat transfer, protecting delicate ingredients like beeswax or oils. Choose a pot that provides enough space for the bowl to sit securely without touching the water. Consider your lip balm packaging options—small jars, tins, or tubes—and make certain your equipment accommodates filling these containers efficiently. Proper equipment also makes ingredient sourcing easier, as you can melt and combine ingredients precisely. Avoid using plastic or non-heat-resistant materials, as they can melt or release harmful chemicals during the process. The right tools streamline your DIY project while maintaining safety and quality. Support hours may vary if you need assistance with your equipment or project, so check the support hours before reaching out.
Gentle Heating Techniques
To prepare a double boiler for melting your lip balm ingredients, start by filling a pot with about an inch of water—just enough so that when you place the heatproof bowl on top, it sits above the water without touching it. Using gentle warming techniques is key to prevent overheating, which can degrade your ingredients. Maintain steady heat by turning the burner to low or medium-low, ensuring you have good heat control throughout the process. Keep the water simmer, not boiling vigorously, to create a gentle heat that melts your ingredients evenly. Stir occasionally to promote uniform melting and avoid direct contact between the heat source and your mixture. This careful approach preserves the quality of your natural ingredients and results in a smooth, well-melted base.
Making Basic Natural Lip Balm

To make your basic natural lip balm, you’ll need a few essential ingredients like beeswax, carrier oils, and flavoring. Once you have everything ready, simple preparation steps involve melting and mixing them thoroughly. With these straightforward steps, you’ll create a nourishing balm perfect for everyday use. Additionally, using natural ingredients can enhance the health benefits of your homemade lip balm.
Essential Ingredients
The essential ingredients for making a basic natural lip balm include nourishing oils, beeswax, and a touch of natural flavor or flavoring oil. Beeswax benefits your balm by creating a protective barrier that seals in moisture and gives the product its solid consistency. It also acts as a natural preservative, helping your balm stay fresh without synthetic chemicals. Nourishing oils like coconut or jojoba hydrate and soothe your lips, while natural flavorings add a pleasant scent and taste. Using high-quality, natural ingredients guarantees your lip balm is gentle, effective, and free from harmful additives. Additionally, selecting essential oils carefully can enhance the therapeutic properties and scent of your lip balm. These core components work together to create a balm that moisturizes, protects, and feels luxurious on your lips.
Simple Preparation Steps
Creating your natural lip balm is straightforward and requires just a few simple steps. First, melt your base ingredients, like beeswax and coconut oil, in a double boiler. Once melted, remove from heat and stir in your chosen flavor combinations, such as peppermint or vanilla, for a personalized touch. Pour the mixture into lip balm containers or small tins, ensuring they are clean and dry. Let the balm cool and solidify at room temperature or in the fridge. When ready, choose attractive lip balm packaging that’s easy to carry and use. This process allows you to customize your balm’s scent and texture while ensuring it’s natural and safe. Additionally, using high-quality ingredients can improve the overall product performance of your homemade lip balm. With these simple steps, you’ll have a nourishing, homemade lip balm ready to enjoy.
Creating Tinted Lip Gloss Bases

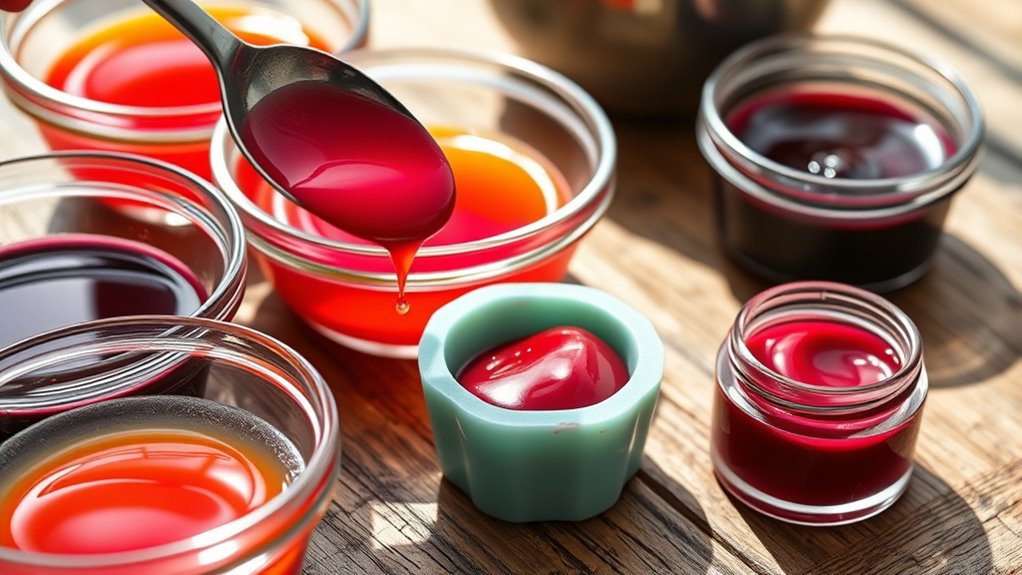
Crafting a tinted lip gloss base begins with selecting the right ingredients to achieve your desired color and texture. Focus on creating a lip gloss consistency that’s smooth, lightweight, and easy to apply. To do this, choose a base made from natural oils like coconut or jojoba, combined with beeswax or shea butter for structure. When sourcing natural pigments, use options like beetroot powder, hibiscus, or mica, which provide vibrant color without synthetic additives. These natural pigment sources allow you to control the tint intensity and guarantee your gloss remains safe and nourishing. Keep in mind that the amount of pigment added will influence both the color and the gloss’s opacity. Once your base is ready, you can move on to adding color and flavor. Additionally, understanding yarn weight can help you customize your lip gloss’s texture if you decide to incorporate any fiber-based ingredients for unique effects.
Adding Color and Flavor to Your Lip Products

Wondering how to infuse your lip gloss with appealing color and delightful flavor? You can easily do this using simple lip gloss techniques and flavor infusion methods. To add color, mix in natural pigments like beetroot powder, mica, or cocoa powder until you reach your desired hue. For flavor, consider using edible extracts such as peppermint, vanilla, or citrus oils. You might also experiment with dried herbs or fruit powders for unique tastes. Here are some options to inspire you:
- Natural pigments for vibrant color
- Edible flavor extracts for sweetness
- Dried herbs for subtle aroma
- Fruit powders for natural tint and taste
- Essential oils for invigorating scent
These methods allow you to customize your lip products while keeping everything natural and safe. Incorporating plant-based ingredients can enhance the safety and nutritional profile of your DIY lip products.
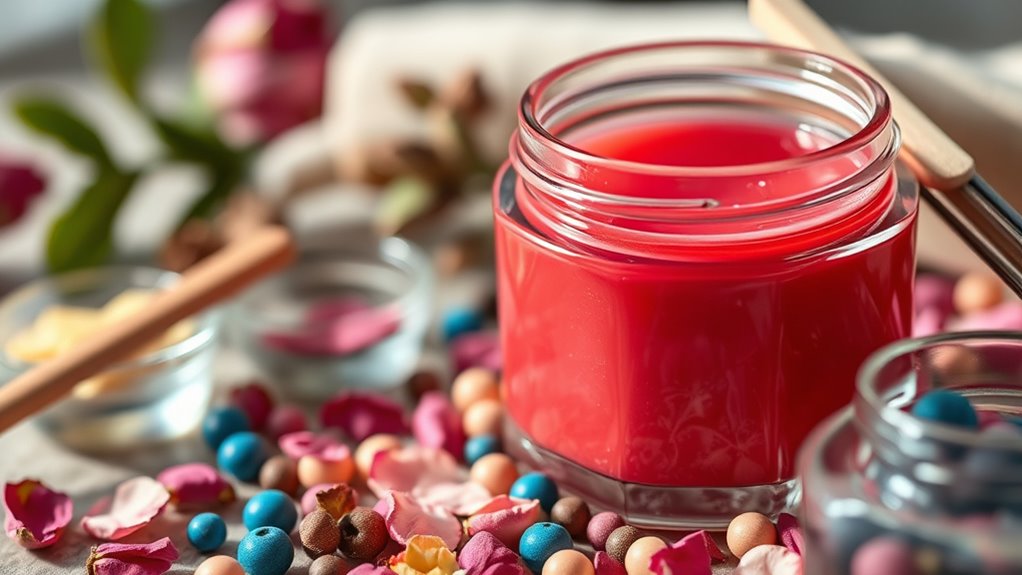
Pouring and Setting Your Homemade Lip Products
Once your lip balm or gloss mixture is prepared, it’s time to pour it into your containers. Use a small funnel or dropper to prevent spills and guarantee the product goes directly into lip balm packaging or small tins. Pour slowly to avoid air bubbles, which can affect the appearance and texture. If you’re making tinted gloss layering, pour the base first and let it set slightly before adding layers, creating a beautiful multi-dimensional effect. Place the containers on a flat surface and allow the products to cool and solidify at room temperature. Avoid moving them during the setting process to prevent uneven surfaces or cracks. Once fully set, cap or seal your containers, and your homemade lip products are ready for use or gifting.
Tips for Customizing Shades and Textures
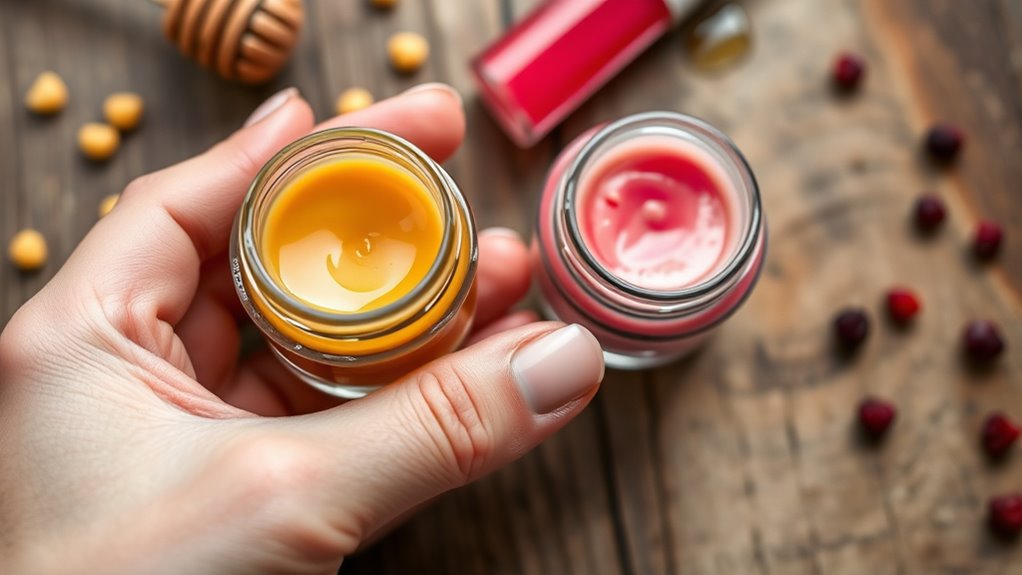
To customize shades and textures effectively, start by selecting high-quality pigments and additives that suit your desired look. Experiment with shade blending to create unique color combinations, mixing different pigments for depth and vibrancy. For texture variations, consider adding natural butters, waxes, or oils to achieve creamy, matte, or glossy finishes. Incorporating sustainable ingredients can also enhance your eco-friendly lip products by reducing environmental impact. Here are some tips: – Use translucent pigments for subtle tinting or build intensity gradually – Mix matte and shimmer pigments for dimension – Adjust wax and oil ratios to change texture smoothness or firmness – Incorporate tiny shimmer or pearl particles for a luminous gloss – Blend different shades thoroughly for seamless color transitions These techniques help you craft personalized, professional-looking lip products with the perfect shade and feel.
Storing and Caring for Your DIY Lip Creations
Proper storage and care are essential to keep your DIY lip products fresh, safe, and effective. For lip balm storage, use clean, airtight containers to prevent contamination and preserve moisture. Keep your lip balm in a cool, dark place away from direct sunlight, which can cause ingredients to spoil or discolor. When it comes to lip gloss preservation, verify your containers are tightly sealed after each use to prevent bacteria buildup and maintain the product’s consistency. Avoid dipping fingers directly into your lip gloss or balm, as this introduces bacteria that can shorten its lifespan. Regularly check your creations for any changes in smell, texture, or color, and discard if you notice any signs of spoilage. Proper care ensures your DIY lip products stay safe and enjoyable to use. Additionally, understanding product shelf life helps you know when it’s time to replace or discard your homemade lip products.
Frequently Asked Questions
How Long Can Homemade Lip Balms and Glosses Be Stored Safely?
You might wonder how long homemade lip products last. Typically, storage duration is about 3 to 6 months if kept in a cool, dry place. Keep an eye out for spoilage signs like changes in smell, texture, or color. If you notice any of these, it’s best to discard the product. Proper storage helps extend shelf life and keeps your lips safe from bacteria or mold.
Are There Any Allergens to Watch Out for in Natural Ingredients?
Think of your ingredients as a garden; some plants may cause allergic weeds. You need allergen awareness to spot potential triggers that could irritate your skin. Always check for ingredient sensitivities, especially with natural components like beeswax or essential oils. Being cautious guarantees your homemade lip products stay safe, preventing allergic reactions. Stay informed and test small amounts first—your lips will thank you for your careful attention.
Can I Use Alternative Oils or Waxes in Recipes?
You can definitely use alternative oils or waxes in your recipes. When considering wax substitution, choose options like beeswax, candelilla, or carnauba wax, depending on your needs. For oils, try jojoba, almond, or coconut oil as substitutes. Just keep in mind that different oils and waxes have varying melting points and textures, so adjust quantities accordingly to maintain the desired consistency and effectiveness of your product.
How Do I Fix a Lip Product That’S Too Thick or Thin?
You might think adjusting your lip product’s consistency is complicated, but it’s straightforward. To fix a product that’s too thick, gently warm it and add a small amount of oil, then blend well. If it’s too thin, melt and add more wax or solid ingredients. Always test and make ingredient adjustments gradually to achieve your desired product consistency, ensuring it feels perfect on your lips.
Is It Safe to Share Homemade Lip Products With Others?
You might wonder if sharing homemade lip products is safe. Sharing safety depends on proper hygiene and preventing ingredient contamination. Always wash your hands before applying and avoid sharing if you or others have cold sores or infections. Use clean tools and containers to reduce bacteria growth. While sharing is common, be cautious because contaminated ingredients can cause infections. It’s safest to keep homemade lip products personal or clearly communicate hygiene practices when sharing.
Conclusion
Now that you’ve crafted your own natural lip balm and tinted gloss, you hold the power to create personalized beauty that truly nurtures your lips. Imagine the joy and confidence each swipe brings, a reminder that beauty can be simple, pure, and entirely yours. So go ahead—embark on this creative journey and let your lips tell a story of self-love and natural elegance. After all, beauty begins with what you make yourself.