To create easy DIY Rangoli patterns for a festive home, start by choosing vibrant colors and simple symmetrical designs. Use flower petals or colored powders to fill in your patterns, beginning with a central motif like a colorful flower to add joy. Keep your lines neat with rulers or stencils, and work patiently to guarantee symmetry. If you keep exploring, you’ll discover more creative tips for making beautiful Rangoli designs that fill your home with festive spirit.
Key Takeaways
- Start with a central, colorful flower as the main motif to create an eye-catching focal point.
- Use simple symmetrical shapes like circles or triangles, guided by rulers or stencils for neatness.
- Outline your design with chalk or colored powders before filling in with vibrant colors or flower petals.
- Maintain symmetry by working from the center outward, ensuring balanced patterns and color placement.
- Add personal touches by experimenting with color schemes and incorporating natural materials for texture.
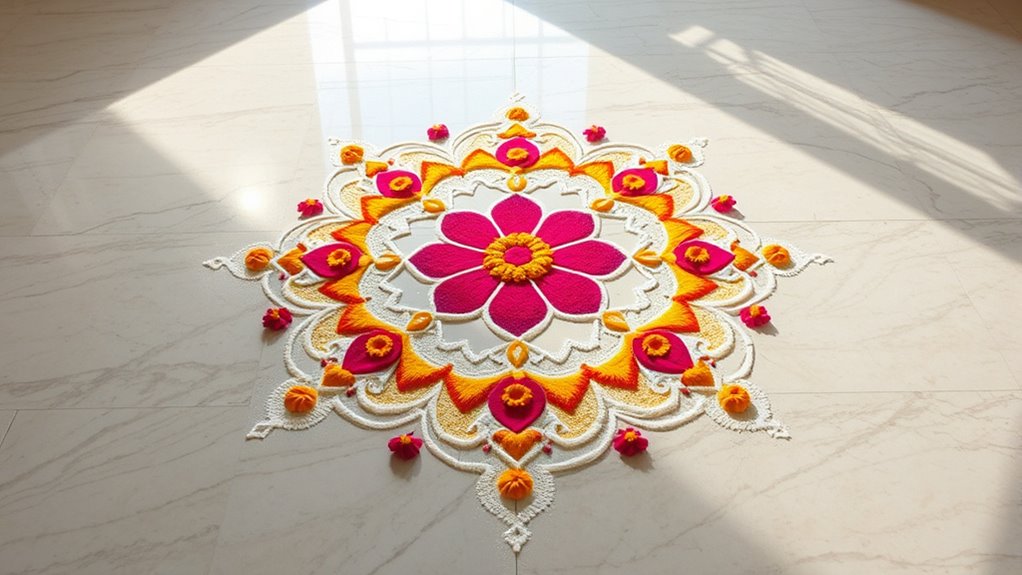
Have you ever wanted to add a personal touch to your festive decorations? Creating a DIY Rangoli pattern is a wonderful way to do that, bringing color and creativity into your home. Rangoli is more than just a design; it’s a reflection of joy and tradition, and making your own can be both fun and rewarding. When you start, focus on incorporating a colorful flower as the centerpiece of your design. A vibrant flower immediately captures attention and sets a lively tone for your Rangoli. You can choose a simple flower shape or go for something more intricate, but guarantee it’s filled with bright hues like pinks, yellows, or reds to make it stand out. Surrounding this bloom with contrasting colors will enhance its beauty and create a striking visual effect.
Add a vibrant, colorful flower as the centerpiece to create a joyful, eye-catching Rangoli design.
Next, consider the concept of geometric symmetry. Rangoli designs often rely on symmetrical patterns to evoke harmony and balance. You don’t need to be an expert artist to achieve this; just start with a central point and create repetitive shapes radiating outward. Use a ruler or a stencil to keep your lines straight and symmetrical, which makes the pattern look neat and organized. Symmetry helps your design look cohesive and pleasing to the eye, especially when combined with the colorful flower at the center. You can experiment with shapes like triangles, circles, or squares, arranging them in symmetrical patterns around the flower to form a harmonious design. This approach creates a sense of order and elegance, making your Rangoli look professional even if you’re a beginner. Incorporating natural materials like flower petals or colored sand can add texture and authenticity to your creation.
When working with colors, stick to a palette that complements your overall theme. Bright, contrasting colors work well for festive occasions, but you can also choose a more subdued, pastel palette for a softer look. Use chalk or colored powders to outline your pattern first, then fill it in with vibrant powders or flower petals for a textured effect. Remember, the key to a successful DIY Rangoli is patience and precision. Take your time to carefully trace your design, ensuring symmetry and color placement are just right. Don’t hesitate to sketch your pattern lightly with chalk before filling in the details. This way, you can make adjustments easily.
Incorporating a colorful flower and emphasizing geometric symmetry will give your Rangoli a stunning, balanced appearance. It’s a wonderful way to showcase your creativity and add a personal touch to your festive home décor. With some simple tools and a little patience, you can craft a beautiful, eye-catching Rangoli that celebrates tradition while expressing your unique style.
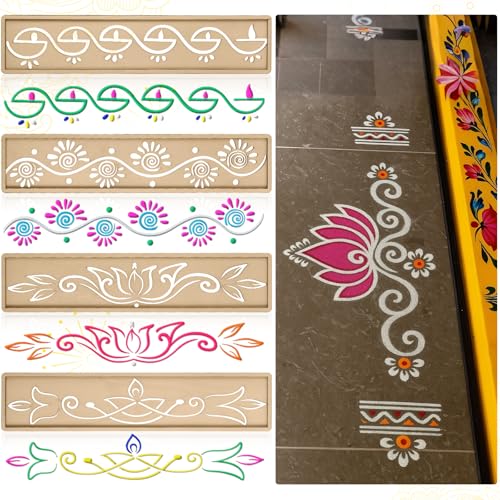
FoldTier 4 Pcs 12 Inch Diwali Rangoli Stencils Wooden DIY Sand Art Making Kit Lotus Elephant Peacock Stencils Varalakshmi Pooja Diwali Items for Indian Onam Festival Home Decor(Diya)
Diwali DIY Decorations: this set includes 4 rectangular rangoli stencils, each measuring 12 x 2.4 inches and featuring…
As an affiliate, we earn on qualifying purchases.
As an affiliate, we earn on qualifying purchases.
Frequently Asked Questions
What Are the Best Materials for Outdoor Rangoli?
When creating outdoor rangoli, you want materials that are vibrant and weather-resistant. Colorful powders, like colored sand or artificial powders, work well for their brightness and easy application. Natural dyes can add eco-friendly, subtle hues, but they may not last as long outdoors. Use a mix of these materials to guarantee your rangoli stays colorful and intact through the festivities, enhancing your home’s festive appeal.
How Can I Make Eco-Friendly Rangoli Designs?
To make eco-friendly rangoli designs, you should use biodegradable powders and natural color dyes. These materials are safe for the environment and create vibrant, beautiful patterns. You can gather natural dyes from spices, flowers, and vegetables, and opt for biodegradable powders that dissolve easily and leave no pollution. This way, your rangoli stays festive and eco-conscious, helping you celebrate while protecting nature.
What Are Common Mistakes to Avoid in Rangoli Making?
When making rangoli, you wanna avoid common mistakes like color smudging, which can ruin your design’s clarity. Keep your colors separate and handle them carefully. Also, watch out for uneven symmetry, as it makes your pattern look unbalanced. Use a steady hand and plan your design beforehand. With patience and attention to detail, your rangoli will look beautiful and festive.
How Long Does a Rangoli Typically Last?
A rangoli usually lasts from a few hours up to a day, depending on seasonal variations and durability factors. If you use dry rice or colored powders, it might last longer indoors, but humidity and rain can shorten its lifespan outside. To make it last, you can add a protective layer or place it in a sheltered spot. Keep in mind, seasonal changes profoundly influence how long your rangoli stays vibrant and intact.
Can Rangoli Be Created With Digital Tools?
You can definitely create rangoli with digital tools, as virtual designs are becoming popular. Using software or apps, you can craft intricate patterns easily, experiment with colors, and save your work without any mess. Digital tools also let you share your designs online or print them out for inspiration. So, if you want to try a modern twist on traditional rangoli, exploring digital tools is a fantastic idea for creative expression.

Matio Color Run Powder, 12 Pack 3.5oz/100g Each Natural Holi Powders Assorted Coloring Rangoli Bulk, Washable Chalk Powders Paint for Color War, Summer Camp, Photography Smoke, Gender Reveals
🌈Multiple Colors Suit: HOLI color powder packets with 12 different vivid colours: blue, pink, green, yellow, red, purple,…
As an affiliate, we earn on qualifying purchases.
As an affiliate, we earn on qualifying purchases.
Conclusion
As you create your rangoli, remember it’s more than just patterns—it’s a reflection of hope, unity, and new beginnings. Let each colorful design be a beacon of positivity, lighting up your home like a guiding star in the night sky. When you step back and admire your work, see it as a vibrant tapestry of your intentions and dreams. Your rangoli becomes a symbol of joy, warming your space and soul alike.
Honbay 960PCS Multicolor Artificial Rose Petals Wedding Party Flower Petals for Wedding Home Party Romantic Night Anniversary Valentine's Day (12 Colors)
Package includes: 960PCS Fake Rose Petals (80pcs each color)
As an affiliate, we earn on qualifying purchases.
As an affiliate, we earn on qualifying purchases.

Mandala Stencils for Painting, Small Diwali Rangoli Stencils for Crafts on Wood Wall Furniture Fabric Tile Rock Mat, Plastic Drawing Templates for Diwali Decorations DIY Projects & Home Decor
Classical Mandala Design: The Da stencils for painting blend traditional and modern art styles, timeless and unique. Great…
As an affiliate, we earn on qualifying purchases.
As an affiliate, we earn on qualifying purchases.